How to Screenshot on Mac: A Step-by-step Guide
WiseCatcher is supported by its readers and we earn a commission if you buy through our affiliate links at no extra cost. Read the full affiliate disclosure in our privacy policy.
WiseCatcher is supported by its readers. You can find full affiliate disclosure in our privacy policy.
Screenshots are an excellent tool for communicating with other people. They can help you explain what’s wrong with their computer to a friend or colleague.
Screenshots are also helpful for sharing funny moments from games or movies with friends on social media. You can even use them for work-related tasks like showing your boss how something should look before it goes into production.
There are a variety of keyboard shortcuts for taking screenshots on your Mac. With the keyboard shortcut, you can take a screenshot of the whole screen or select an area, then click and drag to create a box around what you want to include in your Screenshot.
In this article, we’ll explore how to screenshot on Mac using different options.
Also, learn how to screenshot on Chromebook in our step-by-step guide.
How to Screenshot on Mac with Keyboard Shortcuts
On a Mac, there are various methods for taking screenshots. One of the easiest is keyboard shortcuts, which allow you to capture and store an image quickly.
You have a few alternatives if you want to snap a screenshot on your Mac. Use the built-in tool or the keyboard shortcuts.
Here are some common screenshot-taking keyboard shortcuts:
| KEYBOARD SHORTCUT | FUNCTION |
|---|---|
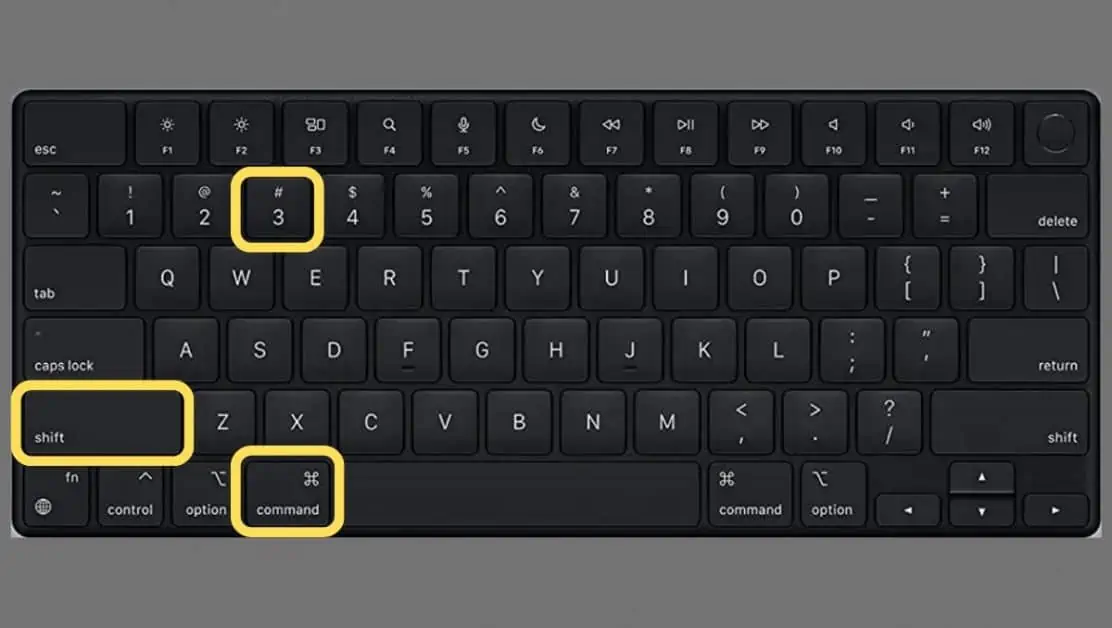
| Shift + Command + 3 | Screenshot of your entire screen |
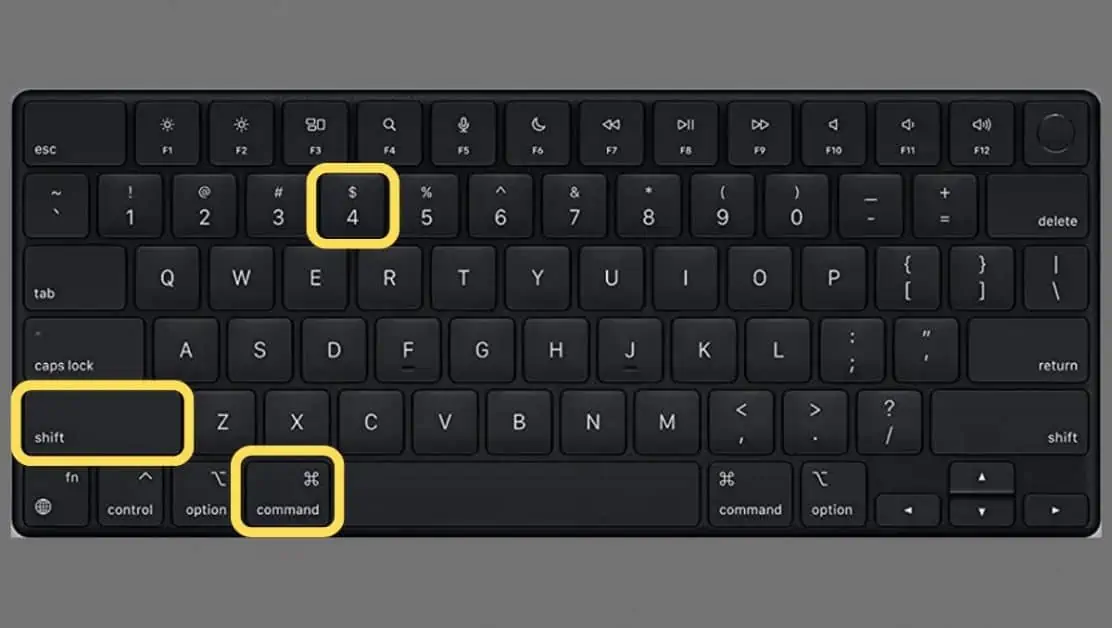
| Command + Shift + 4 | Screenshot of an area of your screen |
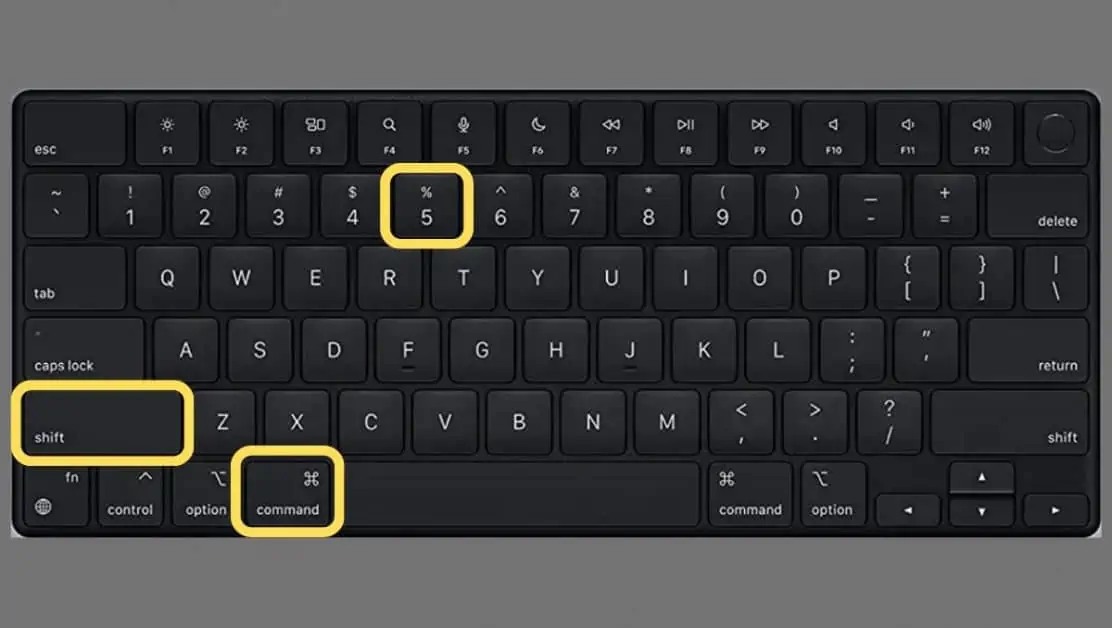
| Shift + Command + 5 | Open Mac’s screenshot menu to edit Screenshot |
| Shift + Command + 6 | Screenshot of a Touch Bar |
Take a Screenshot of the Entire Screen on a Mac
You can take screenshots of the complete screen using the built-in functionality of the Mac operating system. You can use these screenshots to send them to friends, publish them online, or save them for later reference.
On a Mac, taking a snapshot of your entire screen with the keyboard shortcut is the simplest method. Here’s how to take a screenshot of the whole screen:
Check out our guide on how to take Screenshots on a Lenovo laptop.
Take a Window Screenshot or Specific Section on Mac
Sometimes you need to take a screenshot of a specific screen section. For example, you may want to capture an error message and include it in an email.
If you want to capture only part of the screen or the current window, here’s how to take a screenshot on a Mac:
Take a Screenshot or Edit it with Screenshot Menu
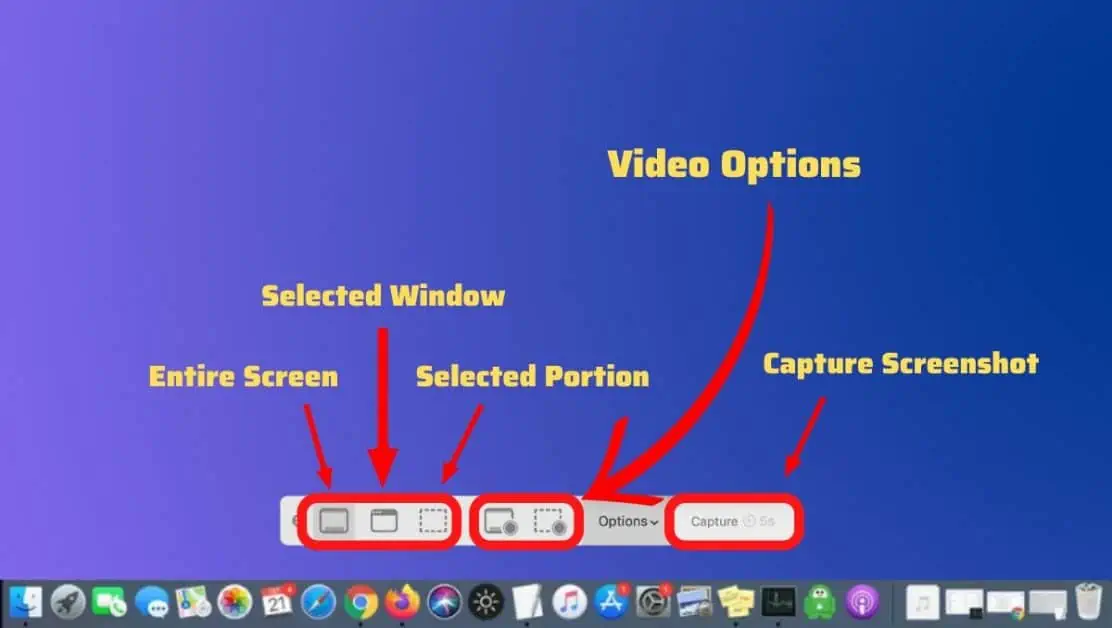
The macOS has a built-in screenshot tool you can launch by pressing Command + Shift + 5. Once you press this shortcut, a small menu panel will appear at the bottom of the screen.
Here’s how to use the Screenshot menu on Mac:
How to Screenshot the Touch Bar of a Mac
Touch Bar is a handy tool for Mac users. The Touch Bar is a multitouch display that replaces the function keys at your Keyboard’s top.
Although some Mac computers do not have the Touch Bar, if you have one, then you can take a screenshot of it.
The following steps describe how to screenshot a touch bar on a Mac:
Where are Screenshots Saved on Mac
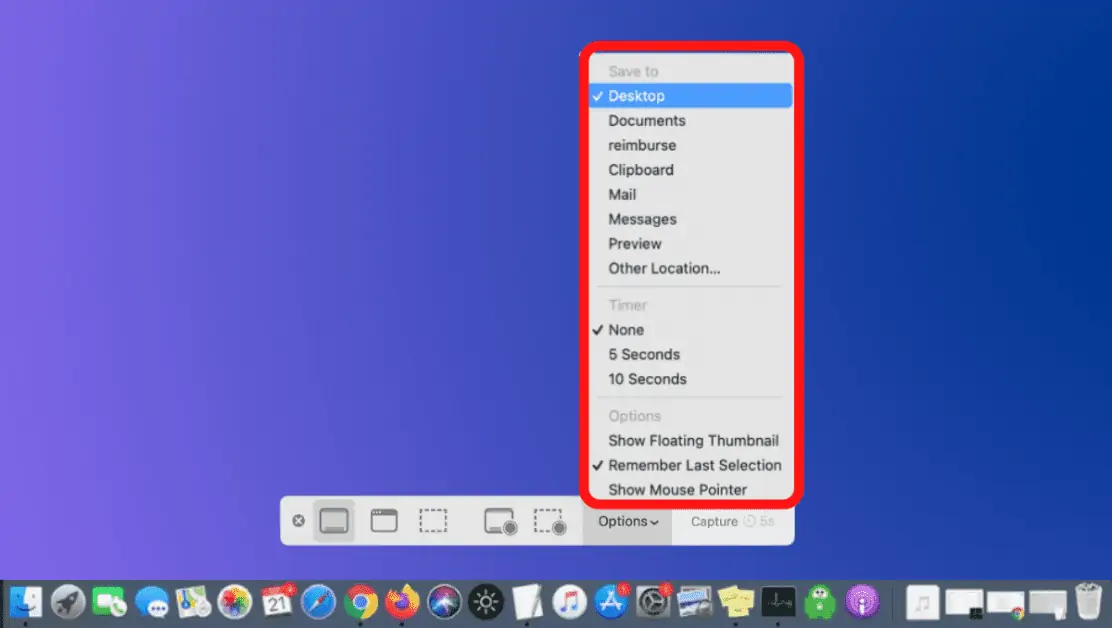
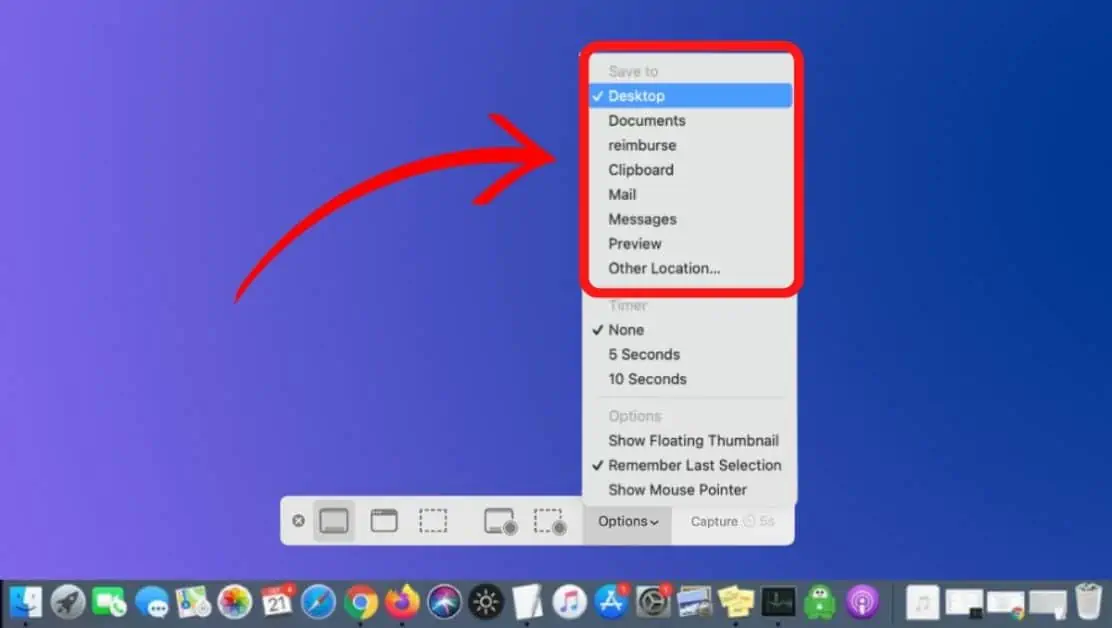
Screenshots are saved by default to your desktop on Mac with the name “Screen Shot,” along with the date and time.
Default location where your screenshots are saved can be changed in macOS Mojave or later. Here’s how to change the folder where screenshots are saved on Chromebook:
Frequently Asked Questions (FAQs)
Let’s look at a few essential FAQs related to taking screenshots on a Chromebook.
How do you edit a screenshot on a Mac?
Once you took a screenshot on Mac, using the keyboard shortcuts Command + Shift + 3 or the Screenshot menu, you can click on the thumbnail that appears in the bottom right corner of the screen to edit or crop your Screenshot.
How do you crop a screenshot on Mac?
If you want to crop the Screenshot on Mac, you can do it quickly using the built-in Screenshot tool if you’re using macOS (Mojave, Catalina, Big Sur, and Monterey) or press Command + Shift + 3 to capture the Screenshot. A thumbnail should appear in the corner of the screen; you can click on this to crop it.
How to copy the Mac screenshot to the clipboard?
Press and hold Control key while taking a screenshot to copy it to the Clipboard. Then, you can either manually copy and paste it or use Universal Clipboard to do so.
Conclusion
You have learned how to screenshot on a Mac through this guide. Let us know in the comments below if you have any questions or concerns about using macOS, and we’ll be pleased to help.

Mohit Patel (Founder & CEO)
Mohit Patel is a part-time blogger and CEO at NeutralX Corp (WiseCatcher’s Parent Company). He is also an M&A Intermediary and the CEO of InstaFlip. He worked with thousands of business owners who own Content Sites, e-Commerce Businesses, SaaS Businesses, Marketplace, and Advertising networks. Mohit knows precisely what kind of content readers are looking for before making any buying decision whether it is a SaaS tool, a physical product, or a product comparison.